OpenShift Build and Deploy a JEE Application with S2I
External
- https://access.redhat.com/documentation/en-us/red_hat_jboss_middleware_for_openshift/3/html/red_hat_jboss_enterprise_application_platform_for_openshift/
- https://access.redhat.com/documentation/en/red-hat-xpaas/0/paged/red-hat-xpaas-eap-image
- https://blog.openshift.com/getting-java-ee-code-running-docker-containers-openshift/
- https://blog.openshift.com/improving-build-time-java-builds-openshift/
Internal
- Builds
- Build Operations
- Application Operations
- Build a JEE Application and Deploy it as a Container in OpenShift
Overview
This article describes the process of setting up a project that builds from sources and deploys a simple JEE application. The source of the application is exposed in GitHub. We will use https://github.com/NovaOrdis/novaordis-session-servlet (Session Servlet Example). The final artifact will be deployed in a EAP 7 instance.
Create the OpenShift Project
The application will be hosted in its own OpenShift project:
oc new-project s2i-build-example \
  --display-name='S2I Build Example' \
  --description='A JEE Application that builds from source and deploys onto a EAP 7 instance'
Identify the Application Template
Since we intend to deploy our JEE application in top of a JEE container, the simplest method is to identify the application template that matches our requirements and use it. OpenShift comes with a series of application templates, which are pre-loaded in the "openshift" project:
oc get templates -n openshift
The application template that matches our requirements is "eap70-basic-s2i"
It can be explored with:
oc get -o yaml template eap70-basic-s2i -n openshift
The template can be used "as-is", or it can be downloaded locally and modified - for example, we can change the labels applied by the template to the objects it creates, so instead of "app=eap70-basic-s2i", we can use a more custom name for our application. Some of the parameters, including the application name, are allowed to be changed on command line. It is a good idea to review the application template and identify all parameters that can be customized.
Accessing the Source Repository
IP Connectivity
If the source of the application is maintained in a source repository such as Gogs, running in a different project, and we want to use the internal DNS name (and IP address) of the repository, we need to enable IP connectivity between our project and the project that maintains the source repository, so the source can be checked out. This is done by joining the projects.
oadm pod-network join-projects --to=cicd lab
Another way would be to expose the source repository publicly over a route and configure the build to use the public address.
Repository Credentials
If the source repository is protected, we need to place credentials into the builder configuration, and the builder service account environment:
oc secrets new-basicauth src-repository-basicauth --username=gogs --password=...
oc secrets link builder src-repository-basicauth
oc set build-secret --source bc/session-servlet src-repository-basicauth
Create the Application
oc new-app eap70-basic-s2i \
  --param APPLICATION_NAME=<application-name> \
  --param HOSTNAME_HTTP=<custom-hostname-instead-of-application_name.project.default_routing_subdomain> \
  --param SOURCE_REPOSITORY_URL=<git-repository-url> \
  --param SOURCE_REPOSITORY_REF=<git-branch/tag-reference> \
  --param CONTEXT_DIR=<path-withing-git-project-to-build> \
  --param GITHUB_WEBHOOK_SECRET=<github-webhook-secret> \
  --param IMAGE_STREAM_NAMESPACE=<imagestream-namespace> \
  --param MAVEN_MIRROR_URL=<maven-mirror-to-use-for-S2I-builds>
Example:
oc new-app eap70-basic-s2i \
  --param APPLICATION_NAME=session-servlet \
  --param HOSTNAME_HTTP=session-servlet.apps.openshift.novaordis.io \
  --param SOURCE_REPOSITORY_URL=https://github.com/NovaOrdis/novaordis-session-servlet.git \
  --param SOURCE_REPOSITORY_REF=master \
  --param CONTEXT_DIR=/ \
  --param GITHUB_WEBHOOK_SECRET=n2H6dtHw6Gw3 \
  --param IMAGE_STREAM_NAMESPACE=openshift
Once executed, the "new-app" command creates the following:
- a "session-servlet" service
- a route that exposes the service as "http://session-servlet.apps.openshift.novaordis.io"
- a project-scoped image stream
- a build configuration
- a deployment configuration
Build
The build process is driven by a configuration created automatically, which is similar to servlet-example Build Configuration.
The build process starts immediately and its logs can be monitored with:
oc logs -f build/session-servlet-1
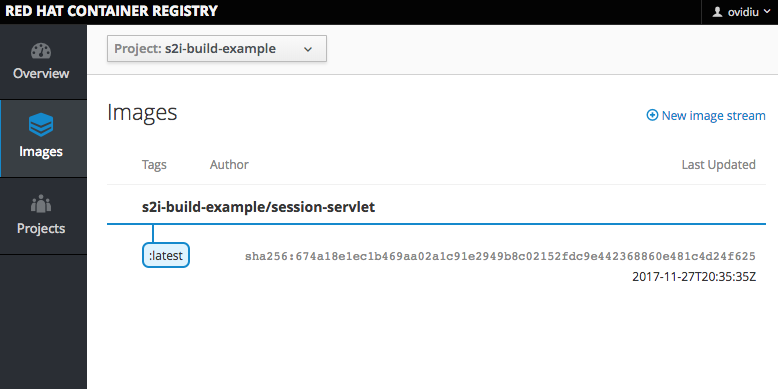
If successful, the build results in the creation of a new deployable image that gets uploaded into the integrated docker registry:
oc get is
NAME              DOCKER REPO                                                          TAGS      UPDATED
session-servlet   docker-registry.default.svc:5000/s2i-build-example/session-servlet   latest    5 minutes ago
How do I build new images and how do I control the tag?
More build operations:
Deployment
The deployment process begins immediately, triggered by an image change in the project's image stream, and results in the creation of a backing pod:
oc get pod
NAME                      READY     STATUS      RESTARTS   AGE
...
session-servlet-1-d8f2b   1/1       Running     0          14m
The pod provides the backing functionality exposed internally by the service, and externally by the route.
External Route
The route created by the new application template is incomplete, in that it does not specify the target port, and in that, it is not usable. It either has to be edited and fixed with oc edit or it can be dropped and recreated as shown below:
oc delete route session-servlet
oc expose service session-servlet --hostname=session-servlet.apps.openshift.novaordis.io --port=8080
More details about route operations are available here:
